TCP/IP has become the default network protocol for Windows operating systems, it’s important to have a good understanding of TCP/IP troubleshooting when working with any of the Microsoft operating systems. Windows computers have a number of built-in utilities that will assist you in troubleshooting TCP/IP problems relating to basic connectivity and name resolution. The most common tools that you should be aware of include the following:
- Ping
- Tracert
- Ipconfig
- Arp
In this section, we will lake a detailed look at each of these tools, including what the tool is used for and what type of output it produces. We will also look at some examples of how to apply these tools.
Ping
The ping stands for Packet Internet Groper. It is most popular command that checks the connectivity between computers by using ICMP (Internet Control Message protocol). The command basically each massage to communicate with other computers. You will usually use the ping command to test basic TCP/IP connectivity between two computers. You can ping a computer using either its IP address or its host name. The ping command has the following switches:
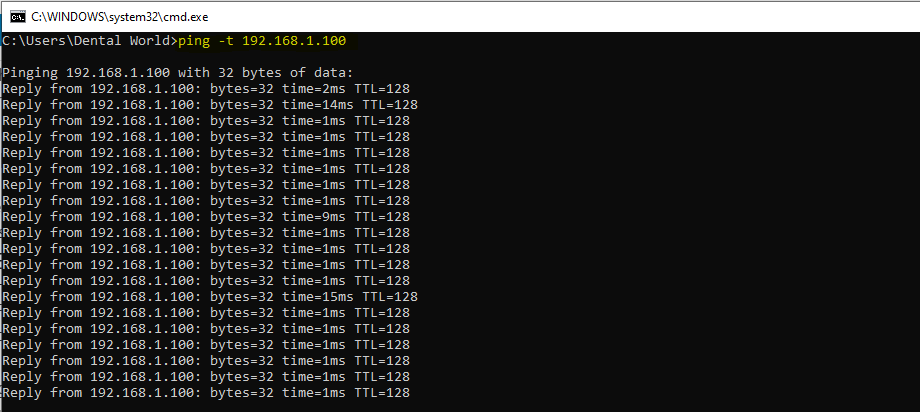
- Ping –t will ping a specified host continuously until you stop it by typing Ctrl + C. Typing Ctrl + Break will show you statistics on the ping results and then continue.
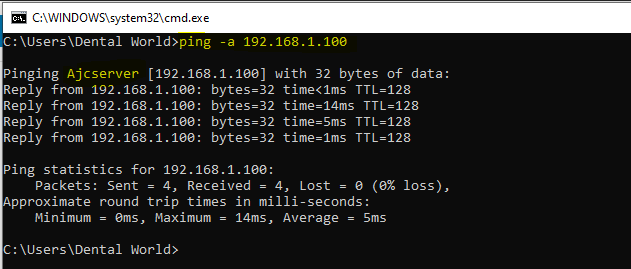
- Ping-a resolves IP addresses to hostnames. For example, if you ping a computer with the IP address 192.168.1.100 and you need to find out its DNS name, you can ping using the –a switch to produce the following output:
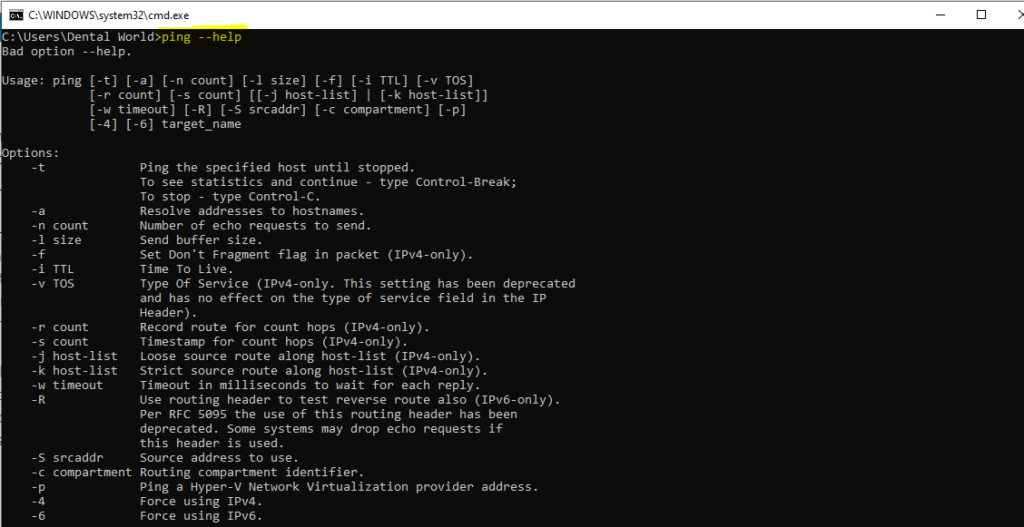
- You can use lot of option as well from Ping Command
Tracert
The tracert utility allows you to trace the path that a network packet will take from one host to another. A network packet will often have to pass through several routers or hops to reach its destination, and you can use tracert to determine whether one of these router, or a link between two routers, is overloaded or has failed. The tracert utility works by sending a series of ICMP echo requests, much like the ping utility.
For example, when you type tracert www.utechnoworld.com at the command prompt, you will see output that resembles the following:

Each line in the tracert output indicates one hop on the path between your local computer and the Destination. The three number at the beginning of each line indicate the round-trip response time from a single ping to get to that router and back. As you can see in the example above, this ping is sent three times to each router. There are also same command line Switches that you can use to customize the tracert output:
- tracert -d will instruct not to resolve IP addresses to hostnames (This will increase the speed of the tracert)
- tracert -h maximum hops: will indicate the maximum number of hops that tracert will use to search for a target. if tracert reaches this maximum number and hasn’t reached the target yet, it will quit. The default value is 30 hops.
- tracert -w timeout : indicates the amount of time each ping will wait for each reply, in milliseconds. the default value is 1000 milliseconds.
Ipconfig
The ipconfig utility works at the command line to provide you with IP configuration data for all NICs installed on your local computer. you can simply type ipconfig by itself to see basic information about the NICs in your computer, or you can use a number of switches to retrieve more detailed information At its most basic, the output for ipconfig command will resemble the following:
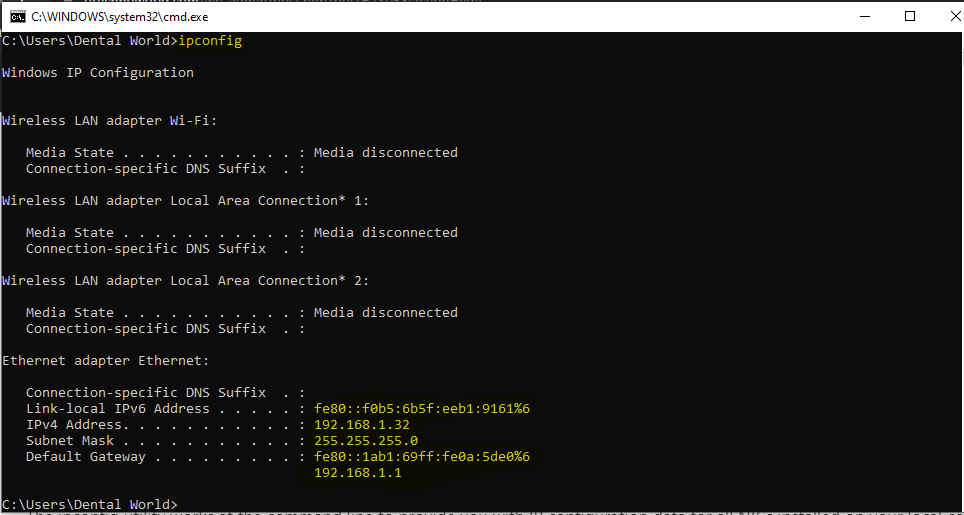
As you can see, the basic ipconfig command provide you the IP address, subnet mask, and default gateway for the NICs installed on a particular machine. This information can be handy as a quick reference when trying to figure out what IP address and subnet mask has been assigned to a particular compute, particularly if it receives its IP configuration from DHCP. You can get more detailed infromationby using the ipconfig /all command, as you can see:
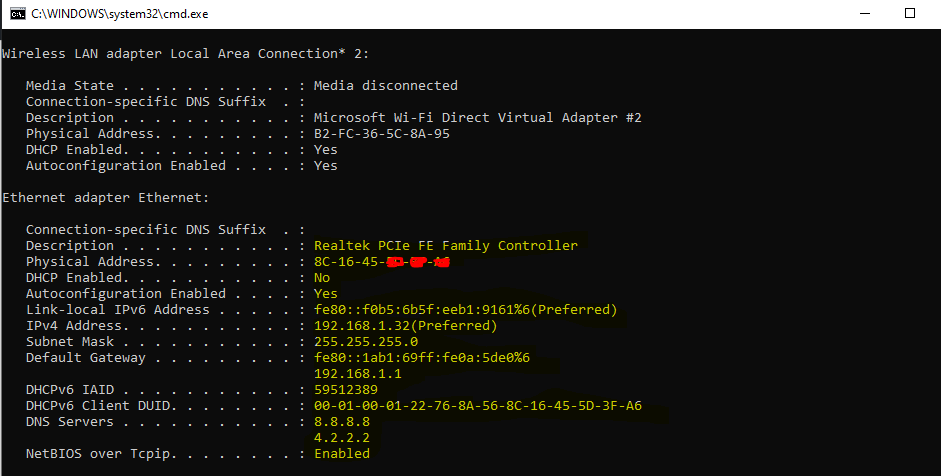
By using the ipconfig /all command, you get information about the DNS and WINS servers that your computer has been configured with, as well as the MAC address of address of each installed NIC. If you’re troubleshooting DNS-related problems, for example, this is a quick way to determine the hostname and primary DNS suffix that you machine using.
- ipconfig /flushdns: you can use the ipconfig /flushdns command to clear the DNS cache on the local computer. this will force the computer to contact a DNS server for any hostname that it tries to connect to this is particularly useful if you have recently made changes to your DNS records so that your clients can access the most up-to-date DNS information.
- ipconfig /displaydns: will show you the contents of the local DNS cache.
- ipconfig / registernds: will refresh DHCP leases for all NICs on the machine, and will re-register the machine’s hostname and IP address with IP address with the sever. The is a helpful switch to use when you have made changes to the local machine’s IP address configuration and need quickly re register the new information with the DNS server.
Arp ( Troubleshoot )
The arp utility allows you to view and manipulate entries in the TCOP/IP arp cache. The arp cache is a list of MAC addresses for computers that have been recently contacted, so that their IP-to-MAC address mapping has been stored by the local computer so it can be located again quickly. The arp utility is helpful when troubleshooting problems that are related to duplicate IP address or duplicate MAC addresses on a particular network segment.
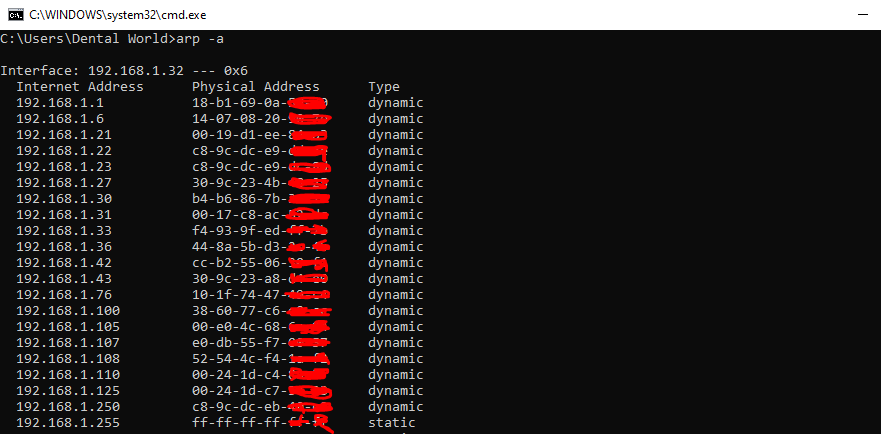
For example, suppose that computer A and Computer B have inadvertently been given the same IP address; 192.168.1.10 computer A is supposed to be 192.168.1.10. and Computer B is supposed to be 192.168.1.11. when machines on the same segment as these two computer try to contact 192.168.1.10, they will send an arp broadcast to resolve the IP address to a MAC address. Depending on which computer responds first, that will be the computer that they connect to. However, because there are two machines with the same IP address, you might connect to different at different times. You can see the contents of the arp cache by typing arp -a at the command prompt. You will see output similar to the following:
The arp utility also allows you to add and delete entries in the arp cache. When you add an entry into the arp cache, you create a static entry. A static entry will be listed with “static” in the type field when you view the arp cache. You might want to create static arp entries for frequently accessed servers on the segment, or perhaps for the default gateway. When you create static entries, the source machine won’t need to issue arp broadcasts to resolve ip addresses to MAC addresses.
1 thought on “Windows Troubleshoot tool and command (Part 1)”